Post Operative Instructions
The First 24 Hours after Surgery
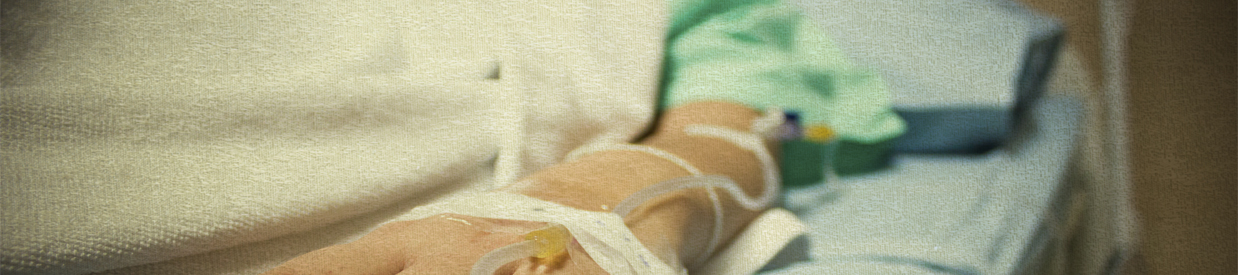
So, your surgery is finally done and you are resting at home wondering what is next. This section will take you through the first 24 hrs. Just like your first night at summer camp, you might be scared about what is going to happen, which is understandable. But realize that just like summer camp, they rarely lost a camper on the first night. Here are some common concerns:
Increased pain
Most patients are given a local anesthetic as well as a regional anesthetic just prior and at the end of your surgery. Every patient responds differently, but on average, the local anesthetic will start to wear off about 4 hours after the end of your surgery. The key to controlling your pain is to anticipate when this would start to wear off and take actions to control the pain. If you graded your pain on a scale of 0 to 10 this would give you an objective measurement of your pain level.
When you start to notice that this pain level is now at level 3, this means the block is starting to wear off. At this time, you should start to supplement your pain management. Normally, this means taking your pain medication. Do not be a hero and wait for your pain level to get to a level 8 or 10. Nobody will win an award for taking the least amount of pain medication or being in the most pain without treatment. It is not a contest. Anticipate and react!
Frequency of pain medications
It is important to take some type of analgesic medication on a frequent basis such as every 4 or 6 hrs. Taking your medication on this regular frequency will help you keep your discomfort at a sustainable level rather than chasing the pain. Keep this up for the first 10 days after surgery.
Ice, Ice Baby
Not only is this the best song ever made by a white suburban pseudo rapper, but it also helps you remember that ice will make you comfortable as a baby in a bassinet. Cooling your joint and surrounding tissues can help reduce swelling, bleeding, and bruising. Icing the area all the time for the first 48 hrs is critical in reducing these components of local pain. Obviously, cooling your joint has benefits, but some risks and complications such as skin damage can occur. These risks and benefits must be considered prior to deciding what is going to be the best way to cool your joint. Simple bags of ice can be used, but these MUST NOT be placed directly on the skin. ALWAYS cover the skin with a dry towel to prevent skin damage. The problem with ice bags are that they normally leak. Thus, you can use some frozen vegetables. These last longer than regular ice and they also keep the area cooler over a longer period of time. I normally recommend buying 4 bags. Keep 1 to 2 on your injured area and the remainder in your freezer. Rotate these about every 90 minutes. Make sure you cover your knee with a DRY cloth so there is no direct contact. A normal knee or ankle may accommodate 2 bags while a wrist or hand may only accommodate one. We also have a larger, more efficient device for purchase in our office. You can view the benefits of this device at
Elevate your Extremity
- If swelling in the operative leg is bothersome, elevate the leg for short periods of time throughout the day. After surgery, it is very normal for the extremity to swell. Gravity is a great way to reduce this swelling since all fluids tend to move to seek the lowest force of gravity. This means your legs have to be higher than your heart. It is normally recommended that your legs have to at least 10 cm with the hip bent no more than 45 degrees and the knee bent at 20 degrees. This can be accomplished with the use of a large couch cushion and a smaller bed pillow. Place the larger couch cushion on your bed followed by a standard pillow from your bed on top of the cushion. You should elevate your leg at least twice a day while awake. And during most of the night for the first 2 weeks after surgery. Some patients require more, but this is a bare minimum. Simple ankle pump exercises and calf stretching exercises can help mobilize excessive fluid and stagnant blood in your legs to reduce the chance of a blood clot. These should be done at least 10 times every hour while awake until you are able to walk normally. Here is a link to a video explaining how to perform these exercises: https://youtu.be/GyDEvpxduNc
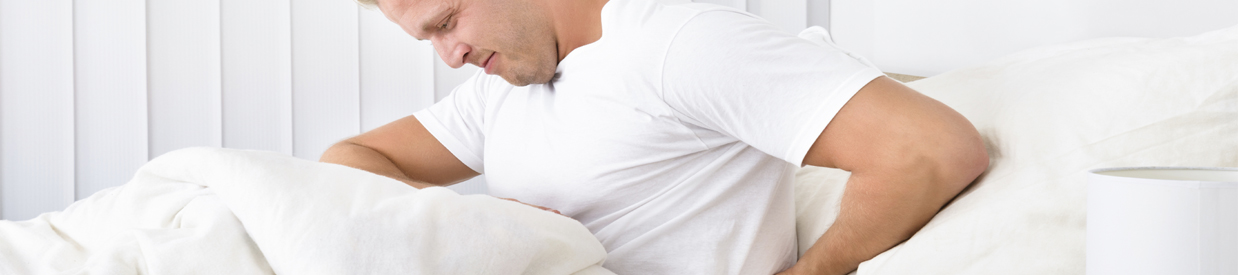
Manage your discomfort after surgery — the first 48 hours
To reduce your discomfort after surgery
Elevate
Keep you're your leg elevated above your heart continuously for the next 48 hours. Please see the enclosed picture for an idea of how to accomplish this in your own home. One of the best methods we have found is to use the larger cushions from a couch and place this on your bed. Place your leg on the top of this cushion while you lie flat on your back. Your leg must be higher than your heart. Sitting up in a lazy-boy type chair is counterproductive since your leg is now lower than your heart.
Ice
Keep your leg cool. This means icing the leg down continuously for the next 48 hours. Our patients report that one of the easiest methods to accomplish this is to purchase 4 large bags of frozen peas from your local grocer. Use one or sometimes two of these bags (depending on the size of your leg) at a time over the top of your leg directly over the dressing. The cold from the peas will gently cool through your dressing and/or cast and keep swelling and pain down to a minimum. The bags need to be rotated back into the freezer about every 90 minutes depending on the outside temperature. You can rotate the already chilled bags back onto your covered leg to keep your extremity continuously cooled. If you have loss of feeling or notice significant blanching of the skin, please discontinue the ice. However, if you keep the ice over the dressing and it does not touch your skin, this should not be a problem. Another option is to use the blue gel packs used in coolers or to purchase a cryotherapy unit such as the Polar Care Cub or the Iceman from a medical supplier. All of these works equally well and the choice is yours. Another useful tip provided by one of our patients is to place a cooler next to your bed at night filled with the frozen peas or blue packs. Place one or two of the bags over your knee and set your alarm for approx 2 hours later. When the alarm sounds, just reach over and pull out one or two more of the peas and place them on to your knee and place the others back into the cooler. This method keeps your extremity cool and free from inflammation and allows you to have a more restful night.
Medication
Take your medication continuously for the first 48 hours. When you first arrive home, take the pain medication prescription according to the instructions so when the anesthesia wears off, your pain is minimal. Repeat the dosing according to the directions for the first 48 hours and than you may want to take the medication only when you need it.
Taking Care of your incision(s)
It is very important to take care of your incision(s). Please follow these tips below:
- Keep your dressing dry and clean.
- We recommend a good old-fashioned sponge bath if possible to keep the dressing dry and clean.
- If you need to use a shower, we recommend that you first wrap the area with an absorbent terry cloth towel. Cover this with a large plastic bag and tape the top well. Keep the spray away from the extremity and never submerse the extremity. Dry your entire body off first before taking the bag off. If you are interested, you can purchase a protective bag from our office.
- Unless you are instructed otherwise, after 72 hours you can remove the dressing around your extremity.
- Some bloody drainage in and around the dressing is very normal. Wash the area down with some warm soapy water and blot dry.
- Cover the incision with a very small film of antibiotic cream such as Neosporin or Bacitracin (these can be purchased at any pharmacy without a prescription).
- Place some band-aids over the incisions.
- Report any abnormalities around the incisions to our office. It is normal to have some mild to moderate redness around the incisions and you may notice some clear or even some blood tinged drainage from the area for up to one week.
please report the following to our office:
- Increasing drainage from the incisions.
- Increasing redness.
- Foul odor.
- Increasing swelling accompanied by pain.
- Fever over 101 degrees (take your temperature twice to ensure accuracy).
- Increasing pain not relieved with rest, elevation, ice and the pain medication.
When to call
Please notify us of any of the following symptoms. Call our office anytime. If your symptoms are increasing suddenly and you do not here from us right away, report to the nearest emergency room for evaluation and treatment.
- Increasing drainage from the incisions.
- Increasing redness.
- Foul odor.
- Increasing swelling accompanied by pain.
- Fever over 101 degrees (take your temperature twice to ensure accuracy).
- Increasing pain not relieved with rest, elevation, ice and the pain medication.
- Coldness, numbness or a sustained blue color to your extremity.
- Sudden onset of calf pain.
- Sudden onset of shortness of breath.
- Chest pain.
How long of a recovery can I expect?
The answer is not universal, since each person is a unique individual with varying degrees of severity of their condition and each person responds differently to treatment. However, on average, most of our patients recover from a scope of the knee between seven (7) to ten (10) days. Some people take longer and others shorter, but this is just an average. If you have a high demand job, you may require a longer recovery period. During your first post-operative visit, your return to your full activities will be discussed.
When can I drive?
Once again, this is not a universal answer, and each person recovers at different rates. However, most of our patients can drive within one week from the surgery. We do not recommend that you attempt to drive while under the influence of narcotic medication or during the first 72 hours when you have the large bulky dressing on your leg. Once this is removed, you can take a short test drive with someone else by your side. It is recommended you have someone drive you to an empty parking lot and take a short test drive to determine if it is safe for you to drive. Remember, that your decision not only affects your safety, but the safety of your passengers, and the other people on the road.
How long do I need the crutches?
If you had a normal arthroscopic procedure, crutches are optional. Unless you are instructed otherwise, you may only need to use the crutches or a cane until your muscle strength is strong enough to safely ambulate. For most of our patients this is within the first 24 hours. We have provided you with a prescription for a pair of crutches and, if needed, crutch training. We suggest you use them for your own safety and wean yourself off them when you feel confident and safe in your ambulation.
Will I need physical therapy?
Below, you will find a set of easy to complete exercises recommended to help you regain your strength and stability. An overwhelming majority of our patients easily complete these exercises in the comfort and convenience of their own home without the need for a visit to a physical therapist. On your first post-operative visit with us, we can discuss your progress and make further recommendations.
Quadriceps Sets
Quadriceps sets help rebuild your front thigh muscles, which help give your knee its greatest stability. "Quad sets" can be done anywhere, anytime, lying down or sitting. Simply tighten your quadriceps to press your knee toward the floor or bed. Hold for five (5) to 10 second, then relax. It may help to rest your hand on your knee cap and feel it move upward slightly as you tighten your muscles. You may begin doing "Quad sets" 24 hours after surgery. Do 10 to 12 repetitions, and two (2) sets per day.
Heel Slides
Heel slides help you regain range of motion in your knee and hip. Start by lying down or sitting on a firm surface (e.g., a bed, floor, or firm couch). Bend your bandaged knee and slowly slide your heel up the bed or floor, as far as possible, toward your buttocks. Hold for four (4) to six (6) seconds, then slowly slide your heel back down and repeat. You may begin doing heel slides 24 hours after surgery. Do 10 to 12 repetitions, and two (2) sets per day.
Toe Presses
Toe presses help rebuild your calf muscles. Simply press up on your toes with both feet, hold for five (5) to 10 seconds, and slowly lower your heels. Use a support for balance. You may begin doing toe presses 24 hours after surgery. Do 10 to 12 repetitions, and two (2) sets per day.
Ankle Circles
Ankle circles help you regain range of motion in your ankle. Simply circle your foot slowly, five (5) times in each direction, making each circle as large as you can. You may begin doing ankle circles the same day of surgery. Do 10 repetitions, and six (6) sets per day.
Straight Leg Raises
Straight leg raises help rebuild all of the muscles that support your knee.
To the Front: Lie on your back and do a "quad set" as described above. Lift your leg eight (8) to 12 inches. Hold four (4) to five (5) seconds, then slowly lower and repeat.
To the Back: Lie on your stomach and lift your leg straight behind you eight (8) to 12 inches. Hold four (4) to six (6) seconds, then slowly lower and repeat.
To the Outside: Lie on your side, and lift your bandaged leg 12 to 24 inches. Hold four (4) to six (6) seconds, then slowly lower and repeat.
To the Inside: Rest your leg on a low support as shown. Lift your bandaged leg up to touch ankles. Hold four (4) to six (6) seconds, then slowly lower and repeat. You may begin doing straight leg raises 24 hours after surgery. Do 10 to 12 repetitions, and two (2) sets per day.
What about notes for work/school or my disability insurance?
Straight leg raises help rebuild all of the muscles that support your knee.
All of the paperwork needed to document your disability can be completed by discussing this with our staff prior to your surgery. For some disability carriers, we have to do make some phone calls, research your chart, and find the appropriate codes. Because this requires a tremendous amount of time and effort from our staff, we will require a small fee. Please make sure you give all of these requests directly to our staff, since paperwork given to the physician just delays the process. A simple form is also required to complete your request. This can be obtained through any of our staff members.
We appreciate the opportunity to help you in your recovery. We are always available for any questions or comments you may have since our primary objective is to provide you with the best of care. Feel free to talk with any of our staff. We are here to help.

